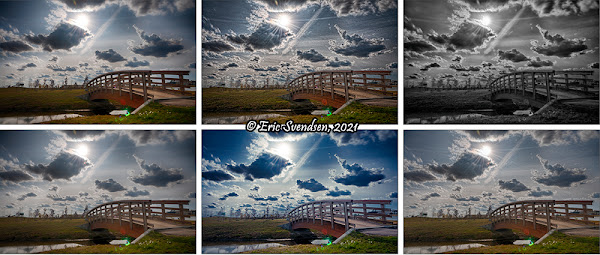
Finalizing the HDR image.
The hard part of creating an HDR image comes from creating the original files that the completed image is based upon. Once that is done, either from bracketing or expanding a RAW image as discussed on my previous blog (click here to view it), you then have to choose the parameters that bring those different components together. Programs such as Photomatix and Nix Pro 2 offer quite a number of preset choices. I pulled up some old bracketed photos I took in Alberta and opened them using the HDR Nix Pro application. After running the program I was given 40 different variations on possible final products; six of them are visible in the above compilation.
I picked the one I liked most and then altered it slightly using the editing tools included with the program. All of the HDR applications I have used allow manipulation of the final image, but I find the interface with Photomatix and Nix Pro to be particularly powerful and easy to use. Once I completed the tweaking process I then saved the image and prepared it for posting here (see the final result below). HDR images can look real or surreal. They can be flat, vibrant, bright, dark, or even monochromatic. The end result is likely to produce an image better than any one of the originals you started with, and the process is quite satisfying. There are free versions of these programs and versions that are included with purchased software or stand-alone paid versions. It may be worth your while to express your creativity by trying one out. I don't use them much, but always enjoy the process when I do. For me, that's really what photography is all about.
Thanks for reading. Ericspix Eric Svendsen


Comments
Post a Comment