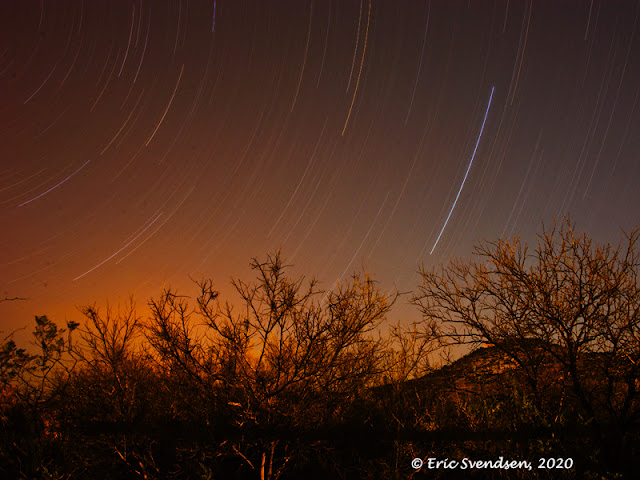
Shooting stars.
 |
| Photo of the stars from Texas |
1. 20 mm vs 28 mm lens - Image 1 used a 20 mm which is considered an ultrawide angle lens. The extra field of view allows you to see more of the night sky than the 28 mm lens does. Both images were photographed on full frame DSLR cameras.
2. Away from city vs near city - Image 1 was photographed far away from any town and had little light pollution. As a result the stars appear with greater contrast than in image 2. You can see the orange glow near the horizon - those are from the lights of San Hosea.
3. f/8 vs f/14 - Image 1 was shot at f/8 while image 2 was shot at f/14; the ISO of both was 100. The lower aperture of the first image allowed the stars to be brighter; the higher aperture for the second was needed to prevent overexposure from the city lights. I would only use a wide open lens if I was doing a short exposure and I would be sure that it was focused properly. Also notice the dim stars are barely registering in Image 2 while they are much more visible in Image 1.
4. 34 minutes vs 150 minutes - star trail length depends on a number of factors. Image 1 shows shorter trails because of the shorter exposure time, wider focal length, and close proximity to the North Star. It also explains why Image 1's star trails are more curved than Image 2's.
5. Prime lens vs zoom lens - Image 1 used a 20 mm prime lens which was very sharp while image 2 used a 28-300 mm zoom lens set to 28 mm. Zoom lenses tend not to be as sharp as primes and are more likely to suffer from distortions such as chromatic aberration.
When shooting, consider doing before and after shots. it is amazing what you can learn about photography by taking two images with one change between the two. In the above case, there were many differences, but the idea still applies.
Thanks for reading. www.ericspix.com Eric Svendsen


Comments
Post a Comment